I spent my first 50 hours in Geometry Dash clicking orbs at the wrong time and wondering why they weren’t working. Pads felt random. Orbs felt inconsistent. Then I sat down, went through every type systematically, and tested them in the editor until I understood what each one actually does. This guide is what I wish existed when I started.
The Most Important Thing to Understand First
Every orb and pad does something specific to your vertical momentum. They do not all “help you jump.” Some reverse gravity. Some lock you to a surface. Some launch you downward. If you’re clicking things hoping for the best, you’ll hit a black orb expecting lift and fall into a spike.
The second most important thing: orbs require your input, pads do not. A pad will fire whether you want it to or not. An orb does nothing unless you click or hold when you touch it. This single distinction explains most orb-related deaths for new players.
Jump Pads (No Click Required)
Pads are set into the ground or ceiling and trigger automatically on contact. You cannot skip them. What makes pads interesting is that they override your current velocity immediately — if you’re falling fast and land on a yellow pad, your downward momentum zeroes out and flips to upward launch force. This makes pads more predictable than orbs since the output is always the same regardless of your approach speed or angle.
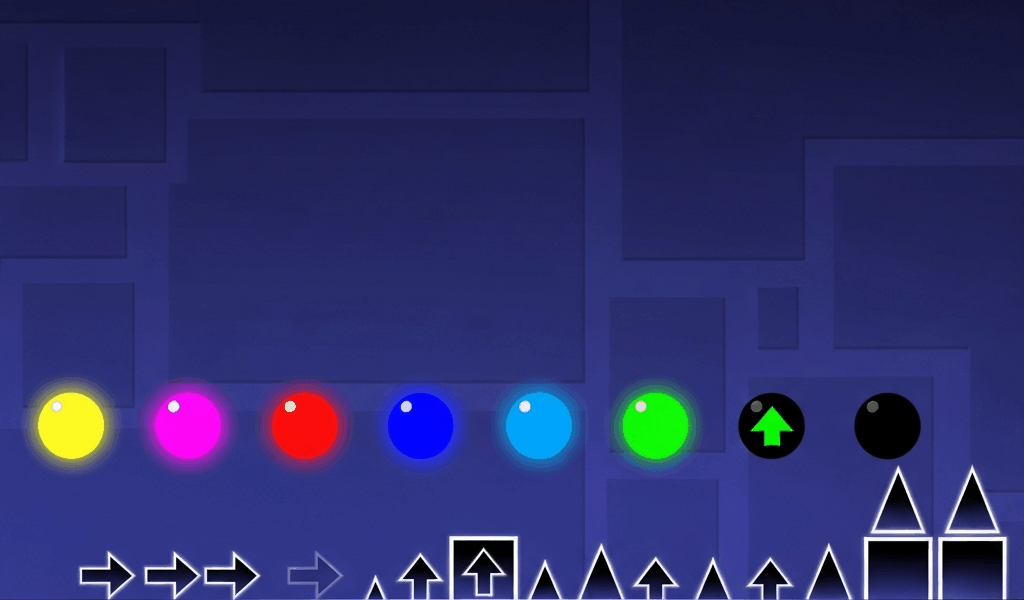
Yellow Pad
Standard jump height — the same height as if you jumped from flat ground. Yellow pads are the most common pad in the game and appear in nearly every main level. Creators use them to guarantee jumps at specific points without relying on player timing. If you see a yellow pad, you’re going to jump. No choice involved.
Pink Pad
Roughly half the height of a yellow pad. Pink pads are used for low corridors and tight platforming sections where a full yellow jump would send you into a ceiling spike. When you see pink pads in a level, expect the ceiling to be close. The arc is noticeably shallower and you land faster.
Red Pad
Significantly higher than yellow. Red pads launch you high enough to reach platforms that would be impossible to reach with a yellow or pink jump. When creators use red pads, there’s usually significant vertical distance ahead. One thing players miss: pads override velocity regardless of how you arrive — if you’re already moving upward and hit a red pad, the upward force stacks and you go even higher. Factor that into your positioning.
Blue Pad
Reverses gravity instead of launching you upward. This is where players get confused — blue pads don’t give you a jump, they flip which direction is “down” for you. After a blue pad, the ceiling becomes your floor until another gravity change. Blue pads are constant in ball mode levels where rapid gravity switching is the whole mechanic. You run over it, you flip. No option to avoid it.
Jump Orbs (Click to Activate)
Orbs float in the level path and require you to tap or hold click while touching them. The key mechanics most guides skip: you can buffer an orb by holding click before you reach it, and orbs have a small activation window around their hitbox. If you click too early (before contact) and release before reaching the orb, you miss it entirely. If you hold, the orb fires the instant you touch its boundary. Holding is almost always the right strategy for orb chains — it removes one variable from the timing equation.
Yellow Orb
Gives you a jump identical to a ground jump regardless of where you are in the air. Clicking a yellow orb mid-fall stops your downward momentum and sends you upward at full ground-jump force. This is what separates yellow orbs from just jumping — you can “reset” your trajectory at any point in the air, not just from a surface. In ship mode, yellow orbs provide an upward impulse. In wave mode they appear rarely and give a brief kick upward. In cube mode they’re exactly what you’d expect: a standard jump wherever you are.
Pink Orb
Low jump equivalent — roughly half the height of yellow. Pink orbs are the precision tool of orb-based gameplay. They give just enough height to clear a small obstacle or avoid a ceiling without sending you dangerously high. You’ll see them frequently in ship sections where exact altitude control matters. In cube mode, pink orbs in rapid sequences are a common source of death because players instinctively expect yellow height and overshoot the timing or clip the ceiling.
Red Orb
High jump — the biggest regular jump-type orb. Red orbs appear when standard jump height is not enough to reach the next platform or when the designer wants a dramatic vertical change. Watch for them in spider and ball sections where the platform above is significantly higher. Important nuance: red orbs in ball mode feel very different from cube mode. Ball mode physics keep you bouncing near surfaces, so the additional height sends you hard into ceiling spikes if you’re not positioned correctly. Test red orb sections in practice mode and watch where your peak height actually lands you.
Blue Orb
Gravity reversal without any jump movement — this is the one that trips up new players the most. Clicking a blue orb does NOT give you lift. It inverts gravity while keeping you at your exact current position. If you’re 30% up the screen when you click the blue orb, you’re still 30% up the screen after — but now falling upward toward the ceiling-as-floor. The blue orb is a pure gravity toggle with no position change.
Common mistake: expecting the blue orb to carry you away from a threat. If you’re close to the ceiling and click a blue orb thinking it will push you down, you’re now on the floor falling toward what was the ceiling. In a spike-heavy section, this kills you in a different direction than you expected. Know your position before clicking.
Green Orb
Jump plus gravity reversal in one click. The green orb does what yellow and blue would do simultaneously — it launches you upward and flips your gravity in the same instant. The result: you arc upward, but you’re now oriented to land on the ceiling as if it were the floor. Green orbs are used when the designer wants you to transition from floor-based to ceiling-based gameplay in a single motion rather than two separate inputs. Timing is trickier than yellow because you need to account for both the jump arc AND the gravity flip when predicting where your peak lands and where you’ll touch down.
Black Orb (Drop Orb)
Sends you downward. This is the only regular jump-type orb that works against your current upward momentum — clicking it drives you toward the current floor rather than away from it. In normal gravity, that means dropping fast toward the bottom. Level creators use black orbs to force fast descents where you’d otherwise float too high and into ceiling obstacles.
The inverted case: in gravity-flipped sections, the black orb pushes you toward what is currently the floor — which visually is the top of the screen. So a black orb in an inverted section actually sends you “up” visually. Don’t assume black always means visual downward.
Also worth knowing: the Steam community has documented that creators frequently recolor black orbs to look like other types as traps. What looks like a yellow orb can be a recolored black orb that drops you. This is most common in troll levels but appears occasionally in high-difficulty custom content.
Special and Advanced Orbs
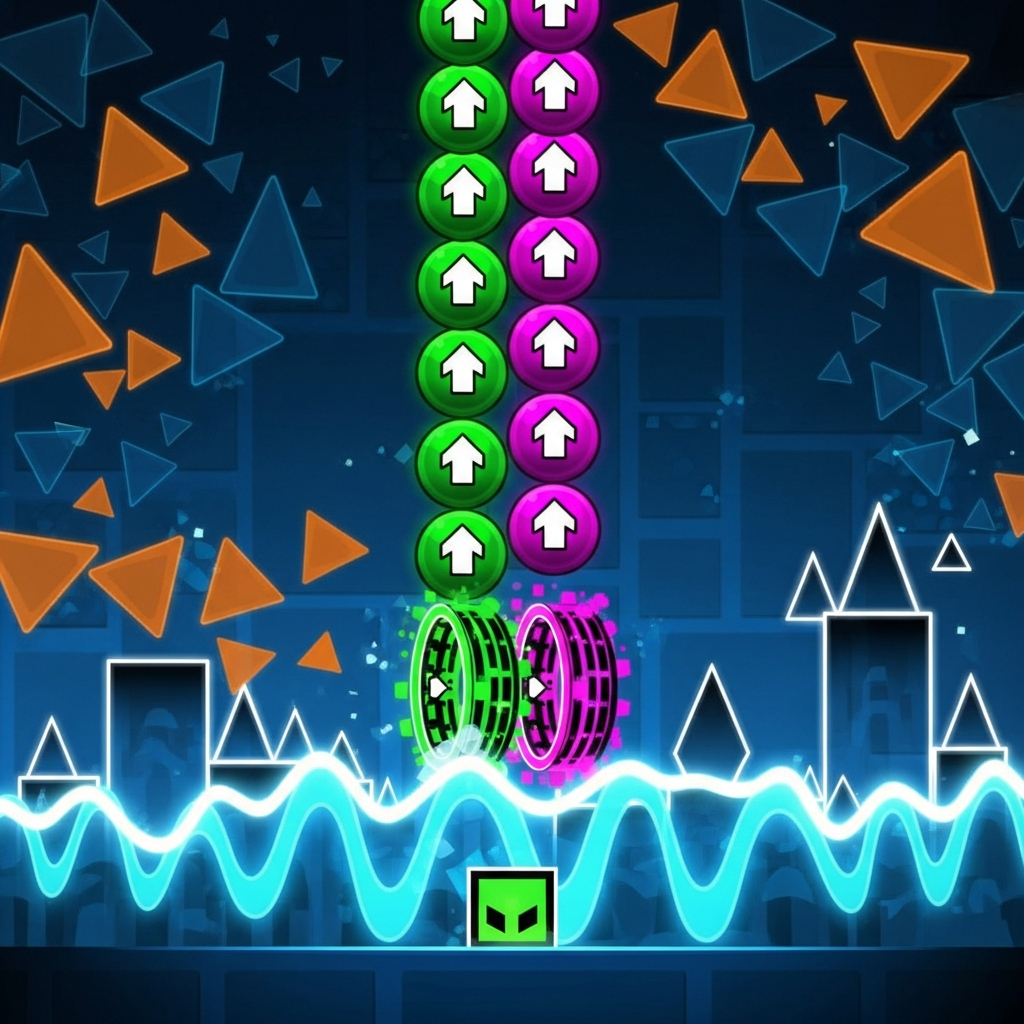
Dash Orbs — Green and Magenta
Added in Update 2.1, dash orbs work completely differently from jump orbs. They do not give you a jump impulse — they lock you onto a trajectory and carry you at speed in the arrow’s direction. Two types exist and they behave differently in a way that matters for how you play sequences:
- Green dash orb — locks you onto the dash path until you hit a surface or another orb. You cannot cancel mid-dash. You ride it out wherever it takes you.
- Magenta dash orb — same dash behavior, but clicking again mid-dash cancels the trajectory and returns you to normal physics. This gives you a control point in long dash sequences.
Dash orbs interact with gravity state. A downward-pointing dash orb in an inverted gravity section sends you toward the visual ceiling, which is your current floor. They also work across multiple game modes — cube, spider, and occasionally ship sections use them, which is part of what makes Fingerdash such a good level for learning their feel.
Spider Orb
Behaves like a single tap in spider mode — it teleports you instantly to the opposite surface. Unlike the blue orb which toggles gravity and lets you fall to the other side, the spider orb is an instant position change. No arc, no transit time, just immediate surface switch. Spider orbs appear in non-spider sections to inject spider-mode mechanics into cube or ball gameplay, creating hybrid segments that catch players who haven’t memorized the level.
The spider orb and the blue orb are the only non-jump orbs that have a pad equivalent. Everything else in the orb list exists only as clickable objects.
Teleport Orb
Links to a specific position in the level set by the creator. Clicking moves you instantly to wherever the teleport is connected. Common use: repositioning you mid-level to a completely different part of the screen, often skipping visible sections or appearing from an unexpected angle. These are almost entirely a memorization element — you will not know where you’re going until you’ve died there at least once. In harder custom levels, teleport orbs chain together as puzzles.
Mode-Specific Orb Behavior
This is the section most guides skip and most players only discover when they start building their own levels in the editor.
Cube Mode
All jump orbs work exactly as described. You can use an orb while already airborne from a jump — the orb overrides whatever jump state you’re in. Multi-orb chains in cube mode are mostly about click timing and position.
Ball Mode
Jump orbs affect gravity the same way — yellow gives an upward push, blue flips gravity. The difference in ball mode is that you’re bouncing between surfaces constantly, so orb timing is about height control more than direction. Blue orbs are extremely common in ball sections precisely because ball mode’s core mechanic is gravity switching and blue orbs provide that on demand without needing a pad.
Ship Mode
Ship has continuous flight — you control altitude by holding and releasing. Orbs in ship sections provide a one-time force impulse that overrides your current vertical movement. A yellow orb in ship pushes you upward sharply; a blue orb inverts your orientation. They appear less frequently in ship sections and usually show up at transition points between sub-sections rather than as the main mechanic.
Wave Mode
Wave gives you full directional control (holding goes up, releasing goes down), so orbs in wave sections are disruptive by design. They appear rarely and usually at mode transition boundaries or in very hard custom levels as challenge elements. Most wave gameplay has no orbs at all.
Spider Mode
Spider mode already uses instant surface-teleport as its core mechanic, so spider orbs feel natural here — they’re just extra taps. Other jump orbs work but interact oddly with spider’s snap physics, which is why you almost never see yellow or red orbs placed in pure spider sections.
Timing and Technique
The Buffering Method
Hold click before reaching the orb and maintain the hold through contact. The orb fires the moment you enter its hitbox. This eliminates reaction-time pressure for single orbs — instead of clicking at exactly the right moment, you pre-commit. For rapid multi-orb chains, you need to release and re-press between each orb. If you hold continuously through a close-spaced chain, the held input activates the first orb and then you need a fresh click to activate the second one. Practice feeling the rhythm of release-and-hold for close orb pairs.
The Click Window
Each orb has a hitbox that defines the contact zone. The click registers any time you’re inside this zone and press or are holding. The window feels generous on yellow orbs (common, forgiving) and tight on pink orbs (often placed in constrained spaces). “Missed orb” deaths are usually one of two things: releasing click just before the hitbox, or clicking after already passing through it. When a specific orb keeps killing you, try buffering (hold before) to see if the timing is the issue or if it’s something else.
What Happens When You Miss an Orb
Nothing. Your momentum continues exactly unchanged. If the level requires the orb to clear an obstacle and you miss, you fall into whatever is there. Some levels have optional orbs in open sections — you can click them for a different path or skip them entirely. Knowing which orbs are required vs optional is part of understanding a level’s intended route. In practice mode, your death position tells you exactly which orb you missed — if you die on the obstacle immediately after the orb, you missed the orb.
Speed and Orb Windows
At 2x speed portals, you move through the orb hitbox twice as fast. The orb itself hasn’t changed, but your reaction window halved. This is why sections that feel manageable at normal speed become brutal after a speed boost — the orbs are the same, your time window is not. Players who grind orb sections at full speed often benefit from slowing down to practice mode (which maintains speed) to build the muscle memory needed at tempo.
Trap Orbs and Deceptive Design
Level creators can recolor any orb using trigger objects in the editor. A visually yellow orb can actually be a black drop orb. This type of deception is common in troll levels and some puzzle levels, rare in rated mainstream content. Two things to watch for:
- Recolored orbs — color is not always truthful in custom levels. In troll levels, assume nothing.
- Invisible orbs — same function as normal orbs, but no visible object. You hit something that isn’t there visually, get launched or dropped, and die. These appear almost exclusively in puzzle/troll levels.
In rated levels and main game content, the color tells you the truth. RobTop’s design standards don’t use misleading orbs in the official campaign. Custom levels from unknown creators: be skeptical.
Quick Reference Table
| Object | Type | Effect | Requires Click |
|---|---|---|---|
| Yellow Pad | Pad | Standard jump | No |
| Pink Pad | Pad | Small jump | No |
| Red Pad | Pad | High jump | No |
| Blue Pad | Pad | Gravity reversal | No |
| Yellow Orb | Orb | Standard jump from any position | Yes |
| Pink Orb | Orb | Small jump | Yes |
| Red Orb | Orb | High jump | Yes |
| Blue Orb | Orb | Gravity reversal, no position change | Yes |
| Green Orb | Orb | Jump + gravity reversal simultaneously | Yes |
| Black Orb | Orb | Forces you toward current floor | Yes |
| Green Dash Orb | Orb | Dashes in arrow direction (cannot cancel) | Yes |
| Magenta Dash Orb | Orb | Dashes in arrow direction (click again to cancel) | Yes |
| Spider Orb | Orb | Instant teleport to opposite surface | Yes |
| Teleport Orb | Orb | Instant teleport to linked position | Yes |
Levels to Study for Orb and Pad Mechanics
The official campaign introduces orbs and pads in a deliberate order:
- Back On Track — yellow pads and simple yellow orbs, lowest-stakes introduction
- Polargeist — orbs used mid-flight, first real test of orb timing
- Theory of Everything — ball mode with blue orbs and gravity chains
- Theory of Everything 2 — longer and more complex orb sequences, good practice level
- Geometrical Dominator — multi-type orb chains at pace, separates memorizers from reaction-players
- Fingerdash — green and magenta dash orbs; the best level in the game for understanding how dash orbs feel different from jump orbs
- Deadlocked — spider sections with spider orbs appearing outside spider mode zones
The Mindset Shift That Makes Everything Click
Once you stop thinking of orbs as “things that help you jump” and start thinking of them as “objects that override your current momentum in a specific way,” the guesswork disappears. Yellow is a jump reset from any position. Blue is a gravity toggle with no movement. Green is both at once. Black is downforce toward the current floor. Dash is a velocity lock in a fixed direction. Spider is instant surface swap.
Orbs and pads are not random. They’re completely consistent. If a sequence keeps killing you, the level is teaching you something specific — about timing, about color recognition, or about where your character is in space when you click. Figure out which orb causes the death, isolate it in practice mode, and the solution becomes obvious.
Related Articles
Continue reading:


Leave a Reply