
You open the gauntlet menu for the first time and see 45 sets of five levels each, all with different themes and zero indication of how hard they actually are. Some look intimidating but turn out to be relaxed. Others have friendly names and then blindside you with a level that takes 200 attempts. After grinding through every single one, here is the breakdown I wish I had before starting.
What Are Gauntlets and Why They Matter
Gauntlets are themed challenge sets — five user-created levels bundled together that you play in sequence. You cannot skip ahead within a gauntlet; you have to beat level one before unlocking level two, and so on. There are 45 gauntlets as of the 2.208 update, with the Love Gauntlet being the most recent addition from February 2026.
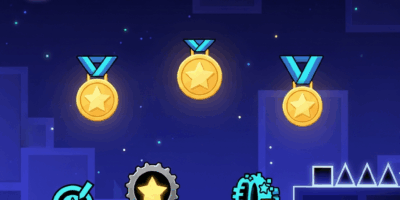
Completing gauntlets earns you shards, diamonds, mana orbs, and exclusive icons you cannot get anywhere else. The shard system matters because collecting enough shards of a specific type unlocks special icons in the Treasure Room. If you care about filling out your icon kit — and most serious players do — gauntlets are not optional. They are one of the most efficient ways to earn tier 1 and tier 2 shards.
The tricky part is that difficulty varies wildly between gauntlets and even within them. A gauntlet might start with three easy levels and then throw a borderline-demon at you as level four. Knowing what you are walking into saves a lot of frustration.
Beginner-Friendly Gauntlets to Start With
If you can beat the main campaign levels through Electroman Adventures, you are ready for these. They will push you slightly beyond the official levels without making you want to throw your phone.
Fire Gauntlet — The entry point for most players and for good reason. All five levels sit in the easy to normal range. The trickiest moment is a tight ship sequence in level three, but nothing that requires more than 10 to 15 attempts. Rewards a fire shard.
Ice Gauntlet — Similar difficulty to Fire but with more variety in game modes. Level four introduces some tricky ball segments that catch people off guard. Learn the timing and it clicks fast. Ice shard reward.
Poison Gauntlet — Slightly harder than Fire and Ice. Level five has a wave section that is the first real skill check in the gauntlet series. If the wave gives you trouble, spend five minutes in practice mode isolating just that section. Poison shard reward.
Shadow Gauntlet — The difficulty starts climbing here. Level three has a dual section that confuses first-timers. Focus on the bottom icon only and let muscle memory handle the top. Shadow shard reward.
Lava Gauntlet — The last of the tier 1 shard gauntlets. Harder than the previous four but still manageable for anyone who has beaten a few harder official levels. Level five is the wall — a fast-paced ship section with tight corridors. Slow, controlled movements beat jerky reactions every time.
Mid-Tier Gauntlets That Test Your Skills
These require solid fundamentals across all game modes. If you have beaten your first easy demon, you can handle these. If you have not, you might want to come back after getting a demon or two under your belt.
Bonus Gauntlet — Do not let the name fool you into thinking it is a freebie. The difficulty here is uneven — levels one and two are straightforward, but level four has a mini-wave segment that demands precision. The jumps in difficulty within this set are the most frustrating part.
Crystal Gauntlet — Consistent difficulty throughout, which actually makes it easier to get into a flow state. The levels are well-designed and fair. Level five has some memorization-heavy sections, but practice mode handles that quickly.
Magic Gauntlet — Introduces some creative trigger usage that can disorient you on first attempts. Objects move, colors shift, and the visual complexity ramps up. Treat the first playthrough as a scouting run — die, learn the triggers, then beat it on attempt two or three.
Chaos Gauntlet — Earns its name. The levels switch game modes rapidly, and transitions are designed to catch you if your timing is even slightly off. This is where consistent practice across all game modes pays off. If you are weak in UFO mode, the Chaos Gauntlet will expose it immediately.
Demon Gauntlet — Contains actual demon-rated levels. If you are not comfortable with easy demons yet, skip this and come back. The first two levels are manageable demons, but levels four and five ramp up significantly. Budget 100-plus attempts per level here.
The Gauntlets That Will Break You
These are not for casual players. If you are deep into demon grinding and enjoy punishment, these gauntlets deliver.
Doom Gauntlet — Multiple hard demon-tier levels packed into one set. Level three is where most people get stuck, with a long wave section that requires surgical precision. Set a session limit — 30 minutes max — or you will tilt and play worse. Come back the next day with fresh hands.
Monster Gauntlet — The visual complexity here is extreme. Levels are decorated to the point where reading the gameplay becomes a challenge on its own. Turn off particles and reduce visual effects in settings if you are struggling to see what is happening. The gameplay underneath is hard but fair — you just have to see it first.
Time Gauntlet and Galaxy Gauntlet — Both contain levels that sit at the upper end of what most players will ever complete. Expect hundreds of attempts per level. These are completion goals, not casual evening sessions. The rewards are rare icons that relatively few players have earned.
The newest gauntlets from 2.208 — including the Love Gauntlet from February 2026 — tend to be mid-tier in difficulty but feature more modern level design with platformer elements and updated trigger systems. They are worth playing for the novelty even if the rewards are not dramatically better than older gauntlets.
Gauntlet Completion Rewards — What You Actually Get
Every gauntlet completion gives you a combination of shards, diamonds, mana orbs, and stars. The first five gauntlets (Fire through Lava) each reward a specific tier 1 shard type. Tier 1 shards unlock basic icons in the Treasure Room — nothing flashy, but they are prerequisites for unlocking tier 2 shard rewards later.
Tier 2 shards come from later gauntlets and unlock more exclusive icons. The rarest icon rewards come from the hardest gauntlets — Doom, Monster, Galaxy — which is why you see so few players with them equipped. Those icons are genuine flex pieces because everyone who sees them knows what you went through to earn them.
Diamonds are the most immediately useful reward. They let you unlock items in the Diamond Shop, including the Practice Music Sync option which is arguably the single most valuable shop purchase in the game. If you do not have Practice Music Sync yet, prioritize gauntlets that give diamond rewards and buy it as soon as possible. Practicing with synced music makes learning levels dramatically easier.
The bottom line on gauntlet order: start with Fire through Lava to build fundamentals and earn tier 1 shards. Move to Crystal and Magic when you are comfortable with harder levels. Save Demon, Doom, and Monster for when you have genuine demon-beating experience. And play the newer 2.208 gauntlets whenever you want a change of pace — they are well-designed and worth your time regardless of where you are in the difficulty curve.

Leave a Reply