Introduction: Understanding Geometry Dash Game Modes
Geometry Dash throws eight distinct game modes at players, each demanding different skills, reflexes, and mental approaches. While the cube gets you started with simple jump timing, the swing copter will have you questioning your life choices at 3 AM. This ranking breaks down every mode from most forgiving to most punishing, based on the learning curve, precision required, and how often each mode appears in the hardest community levels.

Game modes in Geometry Dash aren’t just cosmetic changes—they fundamentally alter how your icon interacts with the level. Gravity, momentum, click timing, and obstacle navigation all shift depending on which mode you’re currently in. Understanding these differences separates players who clear Deadlocked from those stuck on Clubstep.
8. Cube Mode: The Foundation
How Cube Mode Works
The cube is your starting point and the mode you’ll spend the most time with across all official levels. Tap or click to jump, hold for orb sequences, and release to fall back down. Gravity portals flip your orientation, but the core mechanic stays consistent: you’re timing single jumps over obstacles.
Jump height remains constant regardless of how long you hold the button—this isn’t a variable jump system. Your cube maintains forward momentum at a fixed speed (modified only by speed portals), making timing predictable once you learn the rhythm.
Why Cube Ranks Easiest
Cube mode gives you the most reaction time of any mode. Obstacles are typically spaced to allow visual processing before requiring input. The binary nature of jumping (you either do or don’t) means there’s no continuous control pressure. You can briefly relax between jumps, which isn’t possible in modes like wave or ship.
Additionally, cube sections in difficult levels often serve as breathing room between harder mode transitions. Level creators know players need recovery time, and cube segments provide that.
Common Cube Mistakes
New players often jump too early, especially on triple-spike formations. The instinct is to click the moment you see danger, but Geometry Dash rewards waiting until the last possible frame. Another frequent error is mistiming orb chains—hitting blue orbs too early results in lower jumps that clip obstacles.
Gravity portal transitions trip up intermediate players who forget that “jump” now means “fall upward.” Your muscle memory needs separate tracks for normal and inverted gravity.
Practice Recommendations
Run Stereo Madness and Back on Track until you can complete them without dying once. Then move to Polargeist for orb timing practice. For gravity cube work, Dry Out introduces inversions gently. Once comfortable, Fingerdash’s cube sections test reaction speed at higher BPM.
7. Robot Mode: Controlled Hops
How Robot Mode Works
Robot mode introduces variable jump height—something the cube lacks entirely. Tap briefly for small hops, hold longer for higher jumps. This creates a new skill dimension: you’re no longer just timing when to jump but also how much to jump.
The robot moves with a slight weightiness compared to the cube, giving jumps a more grounded feel. You can perform rapid small hops or commit to full-height leaps depending on the obstacle layout ahead.
Why Robot Ranks Here
Robot mode demands more from your input precision than cube, but it’s forgiving in its own way. The ability to adjust jump height means you can often correct minor mistimings by varying your hold duration. Clipped a ceiling? Hold shorter next time. Fell into spikes? Hold longer.
The mode appears less frequently in extreme demon levels compared to wave or ship, suggesting creators find it less suitable for maximum difficulty. It’s challenging enough to require practice but not demanding enough to headline the hardest sections.
Common Robot Mistakes
Overcommitting to jump height causes ceiling crashes. Players conditioned by cube mode hold too long, forgetting that robot jumps scale with input duration. The opposite problem—tapping too briefly—results in pathetic hops that don’t clear basic obstacles.
Transitioning from robot to other modes catches players off-guard because the hold-duration skill doesn’t transfer. Your brain wants to keep modulating jump height when the new mode doesn’t support it.
Practice Recommendations
Geometrical Dominator features extensive robot sections with varied obstacle heights. The level teaches hold duration naturally through its design. For pure robot practice, search community levels tagged “robot only” and sort by downloads to find well-designed training grounds.
6. Ball Mode: Gravity Switching
How Ball Mode Works
Ball mode replaces jumping with gravity reversal. Each tap flips your gravity, sending you rolling along the opposite surface. You’re constantly moving forward while bouncing between floor and ceiling based on your inputs.
Unlike cube jumps that have fixed height, ball gravity switches are instantaneous and complete. There’s no variable here—you flip or you don’t. The challenge comes from timing these flips to navigate obstacles on both surfaces simultaneously.
Why Ball Ranks Here
Ball mode requires processing obstacles above and below you at all times. This dual-surface awareness demands more mental bandwidth than cube or robot. However, the consistency of the gravity switch (no variable height, no continuous control) keeps it from reaching the difficulty of ship or wave.
Tight ball sections can be brutal, but the mode has natural limits. Obstacles can only exist on two planes, and your movement between them follows predictable physics. Skilled players develop a rhythm for ball sections that cube mode can’t replicate.
Common Ball Mistakes
Double-tapping accidentally causes immediate gravity re-reversal, slamming you into the surface you just left. Players panic at incoming obstacles and input twice when once would suffice.
Forgetting which surface you’re on after a series of rapid switches leads to tapping when you should wait. The visual information overload during dense ball sections causes input paralysis or spam-clicking.
Practice Recommendations
Clutterfunk’s ball segments introduce the mode with reasonable spacing. Hexagon Force escalates difficulty with faster switches and dual-surface obstacles. Community levels like “Ball Practice” by verified creators offer focused training without mode transitions interrupting your flow.
5. UFO Mode: The Floaty Menace
How UFO Mode Works
UFO mode grants limited flight through repeated taps. Each tap gives an upward boost; releasing causes gradual descent. You’re essentially managing altitude through rapid input modulation rather than single jumps or gravity flips.
The UFO has a distinct floaty physics feel. Momentum carries between inputs, meaning you can’t stop or reverse direction instantly. This creates situations where correct input timing still results in death because your approach angle was wrong.
Why UFO Ranks Here
UFO introduces continuous control requirements that cube, robot, and ball lack. You’re making micro-adjustments constantly rather than timing discrete inputs. The floaty physics punish overcorrection—tap too much and you ceiling crash; tap too little and you floor crash.
Narrow corridors become significantly harder in UFO mode because maintaining a specific altitude requires sustained accurate input. The skill ceiling rises substantially compared to the gravity-based modes below it.
Common UFO Mistakes
Panic-tapping during tight sections sends the UFO rocketing upward uncontrollably. The instinct to “fly harder” when obstacles approach actually makes navigation worse.
Entering UFO sections with wrong momentum from previous modes causes immediate deaths. If you hit a UFO portal while falling rapidly, that downward momentum carries over, and your first taps fight against it rather than lifting you smoothly.
Practice Recommendations
Theory of Everything 2 features UFO sections that gradually increase in difficulty. The level teaches altitude management through progressive challenge rather than throwing extreme sections at unprepared players. Deadlocked’s UFO portions require precise corridor navigation that builds the skills needed for demon levels.
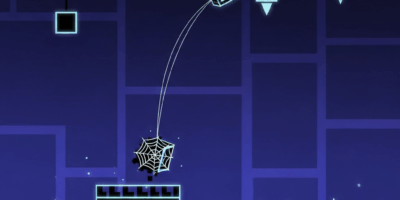
4. Spider Mode: Inverted Thinking
How Spider Mode Works
Spider mode combines ball-style gravity switching with instantaneous teleportation. Tapping flips your gravity AND teleports you directly to the opposite surface. There’s no travel time—you’re immediately on the ceiling after being on the floor.
This instant-transport mechanic creates unique obstacle designs impossible in other modes. Levels can place hazards in the space between surfaces because you never actually occupy that space during a switch.
Why Spider Ranks Here
Spider mode demands faster decision-making than ball because there’s no flight time to adjust your plan. You commit fully to each switch, and the instantaneous nature means mistimed inputs can’t be corrected mid-air. You’re either in the right place or you’re dead.
The mode also creates visual confusion. Your icon appearing instantly on the opposite surface can disorient players accustomed to tracking continuous movement. Your brain wants to follow a trajectory that doesn’t exist.
Common Spider Mistakes
Predicting spider movement like ball movement causes mistimed inputs. Players wait for their icon to “arrive” at the destination when it’s already there.
Double-inputs remain problematic—triggering two switches in quick succession teleports you back to your starting surface, usually into waiting spikes. The instant teleport amplifies the penalty for accidental double-taps.
Practice Recommendations
Fingerdash introduces spider mode with adequate spacing between obstacles. The official level teaches the basic feel before community levels demand extreme precision. Search for “spider tutorial” in the level browser for creator-made practice content.
3. Ship Mode: Continuous Flight Control
How Ship Mode Works
Ship mode enables true flight. Hold to ascend, release to descend. Your ship moves in smooth curves rather than discrete jumps, and obstacles require threading through gaps with sustained accuracy.
Gravity still applies—releasing causes gradual descent rather than instant falling. This creates momentum that must be managed. Sharp direction changes are impossible; every movement arcs smoothly. Speed portals dramatically affect difficulty, as faster speeds leave less time for altitude corrections.
Why Ship Ranks Here
Ship mode demands unbroken concentration. There’s no moment of rest between obstacles like cube mode provides. You’re constantly modulating altitude, and any lapse in focus causes trajectory deviation that compounds into crashes.
The smooth physics that make ship feel good to control also make tight corridors punishing. Oversteering and understeering are constant threats, and the margin for error shrinks dramatically in fast-paced sections.
Common Ship Mistakes
Oscillating wildly through corridors happens when players overcorrect repeatedly. One too-aggressive input leads to compensation in the opposite direction, which requires further compensation, creating a spiral of increasingly erratic flight.
Speed transitions catch players off-guard. A ship section that’s comfortable at 1x speed becomes brutal at 3x because reaction windows shrink proportionally. Mental preparation for speed portals is essential.
Practice Recommendations
Electrodynamix features the most ship gameplay of any official level and remains the gold standard for ship practice. The level teaches smooth corridor navigation and speed management through extended play rather than brief sections. Clubstep’s ship portions test reaction speed at higher intensities.
2. Wave Mode: The Skill Check
How Wave Mode Works
Wave mode moves your icon diagonally—ascending while moving forward when held, descending while moving forward when released. You cannot travel horizontally; every moment changes your altitude in one direction or the other.
The diagonal movement creates unique obstacle patterns. Levels design around the fact that you’re always climbing or diving, never cruising. Gaps must accommodate your approach angle rather than just your icon size.
Why Wave Ranks Here
Wave mode punishes hesitation lethally. Unlike ship where releasing merely causes gradual descent, wave descent is immediate and continuous. There’s zero stable state—you’re always moving vertically, and any input delay translates directly into positional error.
The mode appears extensively in extreme demon levels because its skill ceiling is effectively unlimited. Creators can shrink corridors, increase speeds, and add obstacle density to create arbitrarily difficult sections. Many players consider wave sections the hardest parts of demon levels.
Common Wave Mistakes
Trying to “straighten out” wave movement is impossible but players attempt it anyway. The diagonal nature is fundamental, not something to correct.
Tight wave corridors require micro-inputs that feel unnatural. Holding and releasing in rapid succession to navigate narrow gaps demands finger control most players haven’t developed. The temptation to hold longer for stability actually widens your oscillation.
Practice Recommendations
Electroman Adventures and Clubstep introduce wave with reasonable expectations. For intense practice, search “wave challenge” in the community levels and sort by featured—creators have developed hundreds of wave-focused training levels. Progress from 2-block-wide corridors to 1-block gradually.
1. Swing Copter Mode: Maximum Difficulty
How Swing Copter Works
Swing copter mode inverts your control scheme with each tap. First tap swings you upward; second tap swings you downward; third tap swings you upward again. You’re not just managing position—you’re tracking which direction your next input will send you.
The swinging arc motion means you can’t stop. Like wave, there’s no stable state, but swing copter adds the cognitive load of remembering your current direction polarity. Miss one input and every subsequent input does the opposite of what you expect.
Why Swing Copter Ranks Hardest
Swing copter combines wave’s constant motion requirement with an alternating control scheme that actively works against muscle memory. Your brain wants inputs to consistently do the same thing—swing copter denies this fundamental expectation.
The mode appears in the most recent official content and hasn’t been adopted as widely in community levels because designing for it is difficult. When it does appear, it’s typically in the hardest sections of already-difficult levels.
Common Swing Copter Mistakes
Losing track of your current polarity cascades into complete loss of control. One confused input leads to another, and recovery is nearly impossible during fast sections.
Treating swing copter like wave fails because the alternating direction means you can’t develop consistent timing patterns. Each input requires conscious tracking of your current state rather than rhythmic repetition.
Practice Recommendations
RobTop’s official levels featuring swing copter provide the best introduction since they’re balanced for general audiences rather than extreme players. Community swing copter practice levels exist but vary wildly in quality. Start with featured levels that explicitly mention “swing copter tutorial” in their descriptions.
Dual Mode Combinations: When Things Get Complicated
Understanding Dual Mechanics
Dual mode splits your controls between two icons—one responds to your inputs normally, the other moves inversely (or identically, depending on the dual portal type). This effectively doubles obstacle processing requirements because you’re tracking two death conditions simultaneously.
Hardest Dual Combinations
Dual wave consistently ranks as the most difficult combination. Both wave icons require constant attention, and the lack of stable states means both will crash if you focus on only one.
Dual ship follows closely—the continuous control requirement becomes overwhelming when applied to two flight paths. Asymmetric duals (ship + cube, wave + ball) add the complexity of managing different physics systems simultaneously.
Dual Survival Strategies
Focus on the icon more likely to die. Usually, this is the one navigating tighter obstacles. Trust that your peripheral awareness handles the other icon while your primary focus manages the difficult path.
Practice symmetric dual sections first. When both icons face identical obstacles, you only need to solve one puzzle that applies to both. Asymmetric duals require essentially playing two different games simultaneously.
Practice Recommendations Across All Modes
Building Foundation Skills
Complete all official levels on each difficulty tier before attempting demons. The main levels teach fundamental skills in controlled doses that community levels often skip. Players who rush to demon attempts frequently lack the base skills that earlier levels build.
Targeted Mode Practice
Identify your weakest mode by tracking where you die most frequently. Then find community levels tagged with that specific mode and practice until deaths in that mode become rare. Don’t just replay full levels—isolate problem sections using practice mode and run them until they feel automatic.
Speed Progression
Practice each mode at multiple speed settings. A mode you’ve conquered at 1x speed may destroy you at 3x. Work up through speeds systematically rather than jumping straight to maximum intensity.
Conclusion: Developing Your Complete Skillset
Geometry Dash’s difficulty curve spans from the forgiving cube to the punishing swing copter, with each mode demanding specific skills that don’t always transfer between forms. The best players aren’t just good at their favorite mode—they’ve systematically addressed weaknesses across all eight.
Focus your practice on modes where you die most frequently rather than grinding modes you’ve already conquered. A player who can handle any mode transition is far more capable than one with extreme skill in just wave or ship. The hardest community levels combine all modes in rapid succession, and a single weak link means failure.
Ultimately, improvement comes from deliberate practice of uncomfortable content. If a mode feels easy, you’ve already learned what it teaches. Find the mode that frustrates you most and spend your practice time there. The satisfaction of conquering swing copter after hours of attempts far exceeds cruising through cube sections you could complete blindfolded.
Related Articles
Continue reading:


Leave a Reply