Dual mode has gotten intimidating with all the “impossible challenge” videos flying around. As someone who genuinely couldn’t process two icons on screen for the first three months I played, I learned everything there is to know about rewiring your brain for dual sections. Today, I will share it all with you.
Fair warning: dual mode broke my brain before it clicked. There was a solid two-week stretch where I thought something was wrong with me because I couldn’t do what seemed basic to other players. Turns out that’s completely normal. Your brain literally needs new neural pathways for this.
How Dual Mode Actually Works
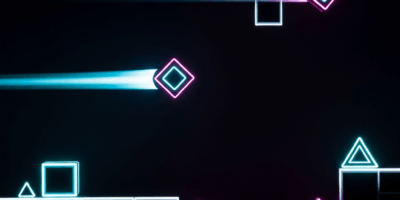
Two icons on screen. One input controls both. When you tap, both icons react simultaneously based on their own physics. You cannot control them independently. That’s the part that breaks people — you keep trying to steer one icon and forget the other exists.
Stop thinking “move icon A here and icon B there.” Start thinking “what single input sequence works for both paths at the same time?” That mental shift is the whole game.
The Three Types You’ll See
Symmetric Dual (The Training Wheels)
Both icons face mirrored obstacles. Whatever works for one automatically works for the other because the paths are identical reflections. These sections are where you learn dual basics since you can effectively focus on just one icon while the other follows along perfectly.
Hexagon Force introduced me to symmetric dual. I died about 40 times before I realized I could just watch one icon and trust the mirror. After that? Beat it in three more attempts.
Asymmetric Dual (Where It Gets Real)
Different obstacles for each icon. You need to find timings that clear both paths simultaneously, even though the visual challenges look completely different. You’re basically solving two puzzles at once with one hand.
This is significantly harder. Some of the most demanding sections in extreme demons are asymmetric dual. I’m apparently still pretty bad at these after hundreds of hours, and finding the “intersection” of valid timings for both icons never stops being satisfying when it clicks.
Mixed Mode Dual (The Brain Melter)
One icon might be a cube while the other operates as a ship. Or wave. Or ball. Different physics for each icon means a single tap produces entirely different movements for each one. A tap that makes your cube jump also makes your ship climb. You need to predict what both will do simultaneously.
That’s what makes dual mode endearing to us GD masochists — it’s the ultimate test of parallel processing.
The Trick That Finally Made It Click
Pick One Icon. Commit.
This is the single best piece of advice I ever got for dual sections. Pick one icon to watch primarily — usually the one with more demanding obstacles. Use your peripheral vision for the other. Don’t try to watch both equally. That divides your attention and you end up worse at both.
Which icon? Depends on the section. Sometimes the upper one has tighter timings, sometimes the lower. I usually do a practice run watching each icon separately to figure out which path is harder, then commit to that one as my primary focus.
Find the Shared Rhythm
In asymmetric dual, there’s always at least one timing pattern that clears both paths. Has to be — otherwise the level would be literally impossible. Your job is finding that shared rhythm. The “correct” timing window is usually narrower than either path individually because it has to satisfy both constraints at once.
Probably should have led with this, honestly. It’s the concept that turned dual from impossible to just hard.
Learn Each Path Solo When You Can
Some level creators include sections that let you play each icon’s path independently. Take advantage of every one of these. Learning each path in isolation helps you understand what each icon needs, which makes finding the combined solution way easier.
Watch Someone Else Do It First
Before banging your head against a difficult dual section for hours, watch a skilled player handle it on YouTube. Notice which icon they focus on. Watch how their timing relates to the music. It gives you a blueprint before you develop your own approach. I do this for every major dual section now and it saves me dozens of attempts.
Levels to Practice On
These offer good dual practice at various skill levels:
- Hexagon Force — the official level that introduces dual with forgiving timing. Start here if you haven’t already.
- Theory of Everything 2 — more advanced dual sections that teach asymmetric concepts. Good next step.
- Community dual challenges — search “dual practice” in the level browser. Tons of training levels.
- Extreme demons — end-game levels have the most complex asymmetric and mixed mode duals. You’ll get there eventually.
Give Your Brain Time
Dual frustrates people because it feels fundamentally different from everything else in GD. And it is. Your brain genuinely needs to develop new processing capabilities to handle two visual streams and synthesize them into single actions. That takes time.
Progress feels slow at first. I remember spending an entire weekend on a 4-second dual section in Deadlocked and wanting to scream. But players who push through the learning curve often find dual becomes one of the most satisfying mechanics to execute. There’s nothing else in GD like watching both icons thread through complex obstacles in perfect sync because of your inputs.
Be patient. Practice consistently. Trust that it will click. Because it will — probably when you least expect it.
Related Articles
Continue reading:

Leave a Reply